

How to Repair Peeling Exterior Paint Correctly
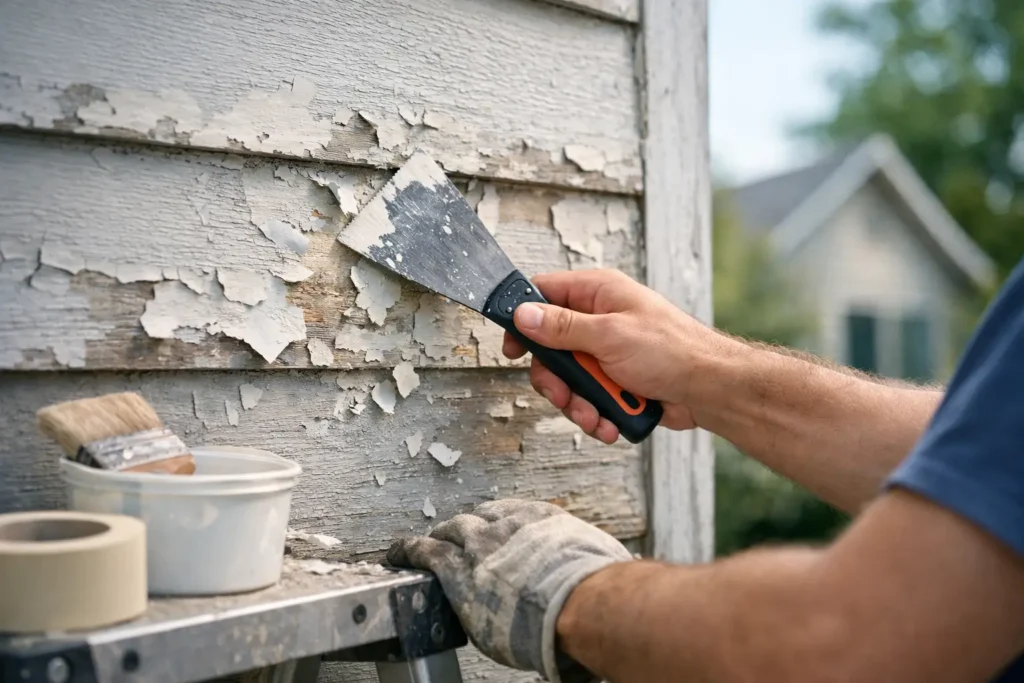
Paint rarely peels because it is simply old. On homes throughout Pierce County and the South Puget Sound area, peeling exterior paint is often a warning that moisture, failed caulk, mildew, bare wood, or a poor previous paint job is allowing the weather to get underneath the coating. Knowing how to repair peeling exterior paint means addressing that cause first, not just covering the damaged area with another coat.
A proper repair protects siding and trim from rain, UV exposure, and seasonal temperature changes. It also prevents a small, patchy paint failure from turning into softened wood, rot, or a much larger repainting project.
Find Out Why the Paint Is Peeling
Before scraping begins, look closely at where the paint has failed. Peeling on window trim, fascia boards, porch posts, and horizontal ledges commonly points to water getting in through cracked caulk, worn flashing, overflowing gutters, or exposed end grain. Peeling across broad siding areas may indicate moisture trapped behind the paint, inadequate surface cleaning, or paint applied over a chalky or glossy surface.
In western Washington, mildew and persistent dampness are part of the equation. North-facing walls and areas shaded by trees can stay wet longer after rain. If a coating was applied to damp wood or over mildew, even a quality paint may lose adhesion prematurely.
Look for these conditions before planning the repair:
- Cracked, missing, or hardened caulk around windows, doors, trim joints, and penetrations
- Clogged gutters, leaking downspouts, roof leaks, or splashback near the foundation
- Soft, darkened, split, warped, or crumbling wood
- Mildew, algae, dirt, chalky residue, or salt-like staining on the surface
- Blistered paint that may signal moisture beneath the coating
If the wood is soft when pressed with a screwdriver or shows visible rot, paint alone will not solve the problem. The damaged material needs repair or replacement before it can hold a primer and finish coat.
Check for Lead Paint Before You Disturb It
If your home was built before 1978, assume older paint layers may contain lead until testing shows otherwise. Scraping, sanding, and pressure washing can create hazardous dust or chips when lead paint is present.
This does not mean an exterior repaint is impossible. It means the work needs the right containment, cleanup, and safe work practices. Avoid dry sanding or using a heat gun on suspect paint. A qualified contractor can determine the appropriate preparation method and protect the work area, landscaping, and occupants.
How to Repair Peeling Exterior Paint Step by Step
The repair itself is straightforward in principle, but each step affects how long the new paint will last. Rushing prep is the most common reason the same area starts peeling again within a season or two.
1. Correct the moisture problem
Start with the source of water. Clean gutters, redirect downspouts, repair leaking roof details, and replace failed caulk where water can enter behind trim or siding. Check that landscaping and soil are not holding moisture against the home.
For wood siding and trim, allow the surface to dry thoroughly after repairs and washing. Paint needs a dry, stable surface to bond. In the Puget Sound climate, that may require waiting for a suitable stretch of dry weather instead of painting immediately after a rain shower.
2. Wash away dirt, mildew, and loose material
Paint cannot bond to grime, mildew, or chalking residue. Wash the affected area with an appropriate exterior cleaner and rinse it thoroughly. A pressure washer can be effective, but it must be used carefully. Too much pressure, or spraying upward beneath siding laps, can force water into the wall system and damage wood fibers.
For smaller repairs, hand washing and a scrub brush may be the safer choice. The goal is a clean surface, not a soaked wall or scarred siding. Let everything dry completely before moving forward.
3. Scrape back every loose edge
Use a sharp scraper to remove peeling, lifting, and poorly bonded paint. Keep going until you reach paint that is firmly attached. A fresh coat applied over loose edges will fail with the old coating.
Do not judge the repair by what looks better from the ground. Test the surrounding paint with the scraper. If it releases easily, remove it. When large sections of paint come off without much effort, spot repair may not be enough. The wall may need more extensive preparation or a full repaint.
4. Sand the transition smooth
After scraping, feather the edges where bare wood meets intact paint. This creates a smoother transition so the repaired area does not show as a raised outline after painting. Sand rough wood fibers, but do not aggressively sand sound paint just to make it look uniform.
Wipe or vacuum away sanding dust. Dust left behind can interfere with primer adhesion, especially on detailed trim, window casings, and textured siding.
5. Repair wood and seal open joints
Inspect the exposed areas carefully now that failed paint is removed. Small cracks may be filled with a paintable exterior patching product, while larger gaps at trim joints need quality exterior caulk. Caulk is intended for narrow joints that move slightly. It is not a substitute for replacing deteriorated wood.
Replace rotted trim, damaged fascia, or severely weathered boards before priming. Coating over compromised wood may improve the appearance for a short time, but it will not restore the structure or keep moisture out for long.
6. Prime bare wood and repaired spots
Primer is the bridge between the surface and the finish paint. Bare wood, repairs, stained areas, and exposed edges need the right exterior primer before topcoating. Skipping this step can lead to uneven sheen, bleed-through, and early peeling.
The best primer depends on the surface and condition. Some situations call for a stain-blocking primer, while others need a product designed for weathered wood or previously painted siding. Using the same paint for every problem is not a reliable approach. Preparation products should match the substrate and the reason the old paint failed.
Allow primer to dry according to its label before applying paint. Drying time can change with temperature, shade, humidity, and overnight moisture.
7. Apply a compatible exterior paint system
Use a quality exterior paint suited to your siding or trim material. Apply it during conditions recommended by the manufacturer, avoiding rain, excessive moisture, direct hot sun, or temperatures outside the stated range. In many cases, two finish coats provide better coverage and a more dependable protective film than one heavy coat.
A heavy coat is not better if it sags, skins over, or traps moisture. Proper coverage, drying time between coats, and clean cut lines matter more than trying to finish the job quickly.
When a Small Repair Becomes a Larger Project
Spot repairs are practical when peeling is isolated and the surrounding paint remains sound. They are less effective when paint is failing across multiple elevations, when there is widespread chalking, or when the siding has repeated moisture exposure.
It also depends on the material. Wood trim can often be repaired in sections, while older wood siding may need a broader plan that includes rot repair, caulking, priming, and repainting the full wall for a consistent appearance. Fiber cement, stucco, and previously coated masonry each require different preparation and coating choices.
A professional inspection can save money when the visible peeling is only part of the problem. Identifying failed flashing, deteriorated boards, or moisture-prone areas before paint goes on helps protect the investment in the new finish.
Avoid the Shortcuts That Cause Repeat Peeling
Painting over loose paint, skipping primer on bare wood, and coating damp surfaces are the usual shortcuts that lead to another failure. Another common mistake is relying on caulk to hide a rotted board. Caulk can seal a sound joint, but it cannot make damaged wood structurally sound.
Pressure washing also deserves caution. It is useful for cleaning exterior surfaces, yet an overly aggressive wash can gouge wood, strip sound paint, and drive water where it does not belong. The right method depends on the home’s age, siding condition, and existing coating.
For homeowners and property managers who want the repair done correctly from the start, K&D Quality Painting can assess the failed areas, address needed wood repairs and preparation, and provide a free estimate for a durable exterior repaint. The best time to deal with peeling paint is while it is still a surface problem, before Washington weather turns it into a wood-repair problem.