Drywall Water Damage Repair: What to Do First
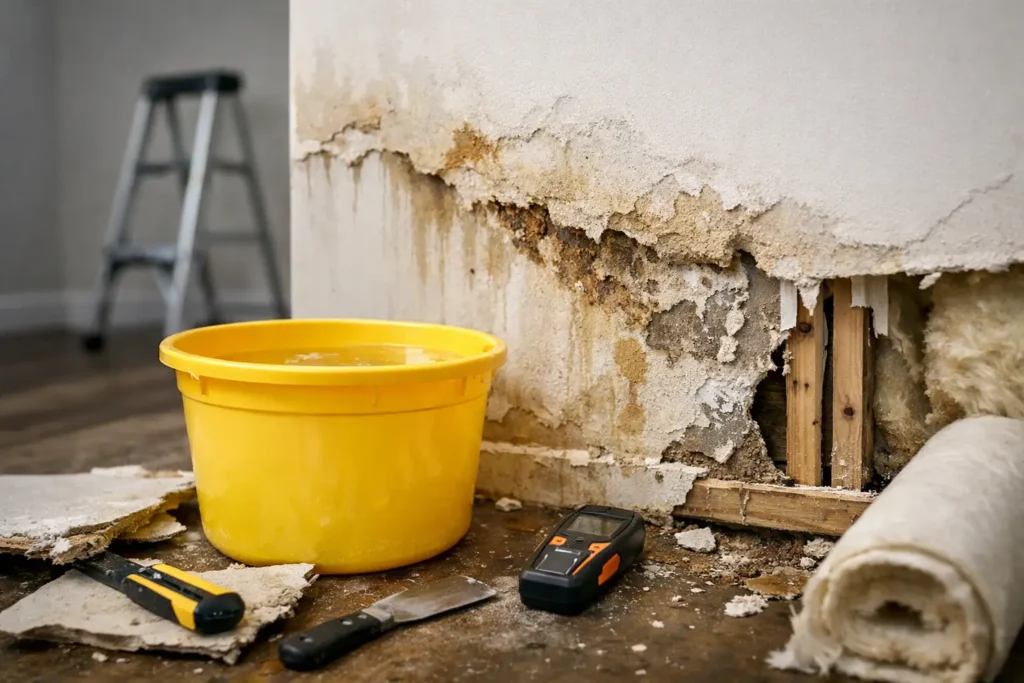
A brown ceiling ring below an upstairs bathroom, soft drywall near a window, or paint that suddenly bubbles after a hard rain is more than a cosmetic problem. Drywall water damage repair begins by finding and stopping the moisture source. Until that happens, patching and repainting only cover a problem that can return, spread, and damage the surrounding wall or ceiling.
For homes and commercial properties in Pierce County and the South Puget Sound area, moisture problems deserve prompt attention. Our rainy climate can expose weak caulking, aging siding details, roof leaks, plumbing failures, and condensation issues. The right repair protects the appearance of the room, but just as importantly, it helps prevent a small wet area from turning into a larger restoration project.
Start With the Source of the Water
Before anyone cuts out damaged drywall or opens a paint can, the leak or moisture condition needs to be corrected. A one-time plumbing overflow is handled differently than a slow pipe leak, roof issue, or window leak that has been feeding moisture into the wall for weeks.
Look at what is directly above, behind, or outside the damaged area. Ceiling damage below a bathroom may point to a toilet seal, shower plumbing, or drain line. Damage around windows can come from failed exterior caulking, flashing, siding, or trim. A stain that returns after rain is a strong sign that the exterior still needs attention.
If water is actively leaking, shut off the water when possible and contact the appropriate plumbing or roofing professional. For larger flooding, contaminated water, or suspected mold growth, a qualified water-restoration or mold-remediation provider may be needed before repair work begins. Drywall repair is most effective after the structure is dry and the original cause has been addressed.
How to Tell Whether Drywall Can Be Repaired
Not every water stain means the entire wall must be replaced. A small, isolated stain from a leak that was corrected quickly may leave the drywall intact. If the board is still firm, flat, dry, and free of odor or visible growth, it may be possible to seal the stain with the right primer and repaint after proper preparation.
However, drywall is made with a gypsum core and paper facing. Once it becomes saturated, it can lose its strength. The paper can separate, the board can swell, and the area may become a place where mold can develop if drying is delayed.
Replacement is usually the better choice when drywall feels soft or crumbly, has swollen edges, sags, has peeling paper, or remains damp after drying efforts. It is also wise to remove material that has been affected by contaminated water, such as a sewage backup or water that may carry harmful pollutants. In those situations, a simple patch is not a dependable long-term fix.
Signs You Should Not Just Paint Over It
Painting over water damage without proper repairs often leads to peeling, bubbling, and stains that bleed back through the new finish. Watch for these signs:
- Soft spots, bulges, sagging, or cracking in the wall or ceiling
- A musty odor, visible mold, or dark spotting around the damaged area
- Stains that continue to expand or reappear after rain or plumbing use
- Damaged drywall tape, loose texture, peeling paint, or crumbling paper facing
A professional assessment can help determine whether the affected section needs to be opened, dried further, repaired, or replaced. The goal is to repair only what is necessary while avoiding a finish that will fail prematurely.
The Right Drywall Water Damage Repair Process
A quality repair is a sequence of steps, not a quick application of joint compound. Skipping the drying, preparation, or priming stage can show up later as visible seams, discoloration, or paint failure.
First, the affected area is evaluated for moisture and structural damage. When drywall needs removal, the damaged portion is cut back to solid, dry material. Depending on the location, insulation behind the wall may also need inspection or replacement. Leaving wet insulation in place can continue trapping moisture even after the surface looks dry.
New drywall is then fitted securely and finished with tape and joint compound. This part requires patience. Multiple thin coats create a flatter surface than one heavy coat, and each coat needs adequate drying time before sanding. A repair on a smooth wall may be relatively straightforward, while orange peel, knockdown, skip trowel, or other textured finishes require careful texture matching so the patched area does not stand out after painting.
Ceiling repairs deserve extra attention because lighting exposes uneven work. A ceiling patch that looks acceptable from one angle may show ridges, flashing, or an obvious texture change when sunlight moves through the room. Proper feathering, sanding, texture work, and primer make a noticeable difference in the finished result.
Drying Comes Before Patching
Fans and dehumidifiers can help dry a room after a small, clean-water incident, but they do not solve every situation. Air movement is useful only after the water source is stopped. If moisture is trapped inside a wall cavity, opening the affected material may be necessary to allow the framing and insulation to dry.
It depends on how much water was involved, how long it sat, and what materials were affected. A minor spill caught immediately may dry without major demolition. A slow leak behind a vanity or a roof leak that has gone unnoticed through several storms can affect framing, insulation, trim, flooring, and adjacent rooms.
Do not rely only on a dry-looking surface. Drywall can look normal while moisture remains behind it. Professionals may use moisture-reading tools and visual inspection to decide whether repair work can safely move forward. Taking the time to dry the area correctly helps protect the new patch, primer, and paint.
Primer and Paint Are Part of the Repair
Once the drywall is repaired, sanded, and clean, primer is not optional. Fresh joint compound absorbs paint differently from the surrounding wall. A quality primer creates a uniform surface, improves adhesion, and helps prevent a patched area from showing through the finish.
For a previously stained area that has been confirmed dry and sound, a stain-blocking primer is often needed. Standard wall paint alone may not stop brown or yellow water marks from bleeding through. The primer choice depends on the stain, the existing coating, and the condition of the drywall, so this is one area where the cheapest product can create more work later.
After priming, the repaired area can be painted to match. Small wall repairs may blend well with careful touch-up, but touching up is less predictable on older paint, dark colors, flat finishes, or walls exposed to direct light. In many cases, painting the entire wall from corner to corner provides the most consistent color and sheen. For ceiling damage, repainting the full ceiling is often the cleanest way to avoid a visible patch.
When to Call a Professional
Homeowners can sometimes handle a small, dry, isolated patch. The trade-off is that drywall finishing and texture matching are skilled work. A repair may be structurally sound but still look uneven under normal room lighting. Water damage also has a way of revealing problems that are bigger than the original stain.
Professional help is especially worthwhile when the damaged area is on a ceiling, involves recurring leaks, includes texture, affects several rooms, or has signs of mold or deteriorated materials. Commercial property managers may also need repairs completed with a clear scope, clean work area, and minimal disruption to tenants, employees, or customers.
K&D Quality Painting handles drywall repair and replacement as part of a complete preparation and painting process. That means damaged surfaces can be repaired, blended, primed, and painted with the finished appearance in mind, rather than treating each step as a separate problem.
Prevent the Next Water-Damaged Wall
After the repair is complete, pay attention to the conditions that caused the damage. Maintain caulking around windows and trim, address roof concerns early, watch for plumbing drips under sinks, and use proper ventilation in bathrooms and laundry areas. Exterior paint and coatings also matter because they help protect siding, trim, and other surfaces from repeated rain exposure when the underlying materials are properly prepared.
If a stain, soft spot, or peeling paint area has appeared in your home or business, do not wait for it to grow. A free estimate can provide a clear path from moisture damage to a clean, durable finished surface that looks right and holds up.