

Wood Window Trim Repair: Fix Rot Before Paint
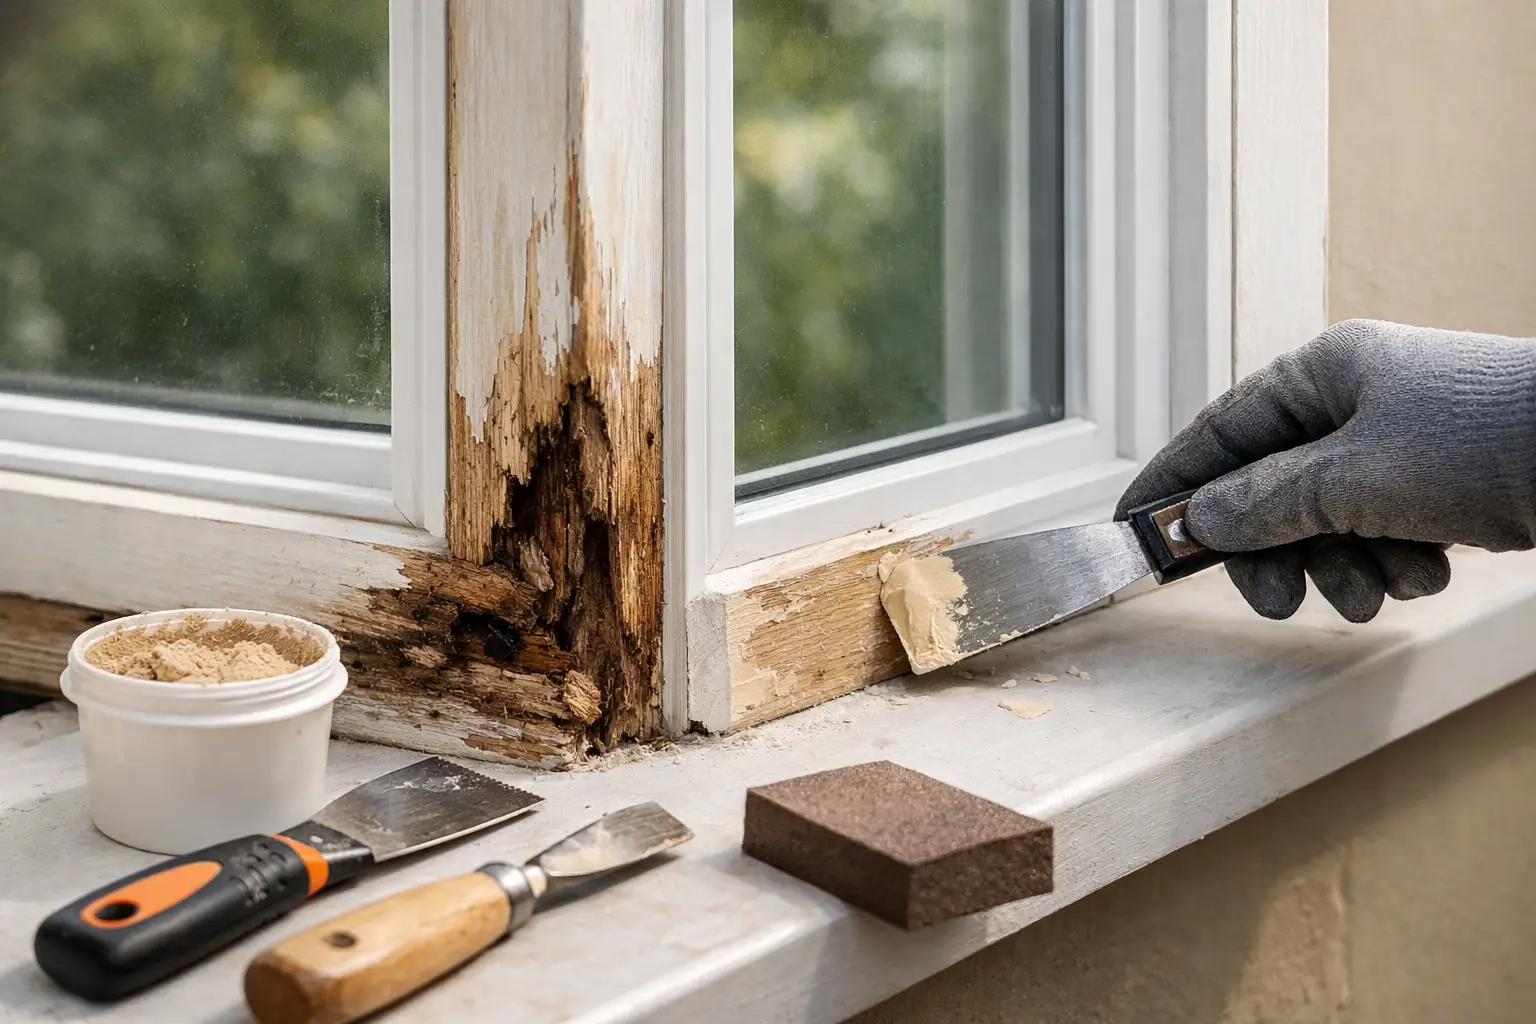
A soft spot below a window can look like a small paint problem until a screwdriver sinks into the trim. In the South Puget Sound, wood window trim repair is often needed because rain, damp air, and failed caulking let moisture work behind the painted surface. Addressing that damage early protects more than curb appeal. It helps prevent a localized repair from becoming a larger siding, sheathing, or interior wall problem.
Fresh paint can make damaged trim look better for a short time, but paint cannot restore wood that has already lost its strength. The lasting approach is to identify where water entered, remove failed material, rebuild or replace the affected trim, and apply the right primer and exterior coating. That preparation is what gives the finished work a chance to stand up to another wet season.
What Causes Wood Window Trim Damage?
Window trim sits at a difficult intersection of weather, joints, and water management. The top and sides of the window are exposed to rain, while the lower trim and sill can hold water if paint, caulk, or flashing has failed. Repeated wetting and drying causes wood to swell, shrink, crack, and eventually break down.
Peeling paint is one warning sign, but it is not always the first one. Hairline gaps at trim joints, cracked caulk, dark staining, mushroom-like growth, bubbled paint, or trim that feels soft when pressed deserve a closer look. A window that has become hard to open may also point to moisture-related movement around the frame.
In older Pierce County homes, the problem may be tied to deferred maintenance rather than one dramatic leak. A small opening at the upper trim, a gutter that overflows near a window, or vegetation that keeps the wall damp can feed moisture into the same area for years. The visible rot is often only part of the story.
When Wood Window Trim Repair Is Enough
Not every damaged board requires a complete window replacement. If decay is limited to a small section of exterior casing, a corner, or a lower trim board, a targeted repair may be the most practical option. The key question is whether the surrounding wood remains solid and whether the source of moisture can be corrected.
A professional assessment should check the trim, sill, siding edges, caulk lines, and wall area around the window. If the damage is shallow and stable, deteriorated material can be removed and the area can be rebuilt with suitable exterior repair materials or replacement wood. If rot extends behind the trim, into the wall framing, or around the window opening, a more extensive repair is usually the honest answer.
There is a trade-off between patching and replacement. A small, well-prepared repair can preserve original details and control costs. But repeatedly patching trim that is soft across a wide area can cost more over time than replacing the affected boards properly. The goal is not the smallest possible repair. It is a repair that holds up.
Why the Water Source Must Be Fixed First
Replacing damaged wood without correcting the moisture path is like putting a new roof over a leak in the ceiling. The new material may look excellent at first, then fail for the same reason as the old trim.
Before painting, the repair plan should account for loose or missing caulk, unprotected end grain, failed joints, gaps where trim meets siding, and drainage concerns above the window. Depending on the condition of the opening, flashing or surrounding siding details may also need attention. Exterior coatings protect wood, but they cannot compensate for water that is continually being directed behind it.
The Right Process for a Lasting Repair
Good exterior work starts with inspection and preparation, not a paint color. The repair process varies by window condition, but it generally follows a clear order.
First, loose paint, damaged caulk, and decayed wood are removed so the full extent of the problem is visible. Sound wood is kept whenever possible, while compromised sections are cut back to solid material. Replacement boards or trim pieces need to fit cleanly, with attention to seams, slopes, and edges where water can collect.
Next, joints and transitions are sealed appropriately after the materials are dry and properly installed. Caulk is useful at controlled gaps, but it should not be used to hide active rot or bridge failing boards. Areas that need to shed water must remain able to do so.
Then comes primer. Bare wood, repaired areas, and exposed end grain need the correct exterior primer before finish paint is applied. This step helps the coating adhere and gives the repaired surface a more even, durable finish. Skipping primer is one of the most common reasons a repair starts peeling early.
Finally, quality exterior paint is applied at the proper coverage and with adequate drying time between coats. In Western Washington, weather timing matters. Painting damp wood or rushing coating application ahead of rain can shorten the life of the work, even when the repair itself is well done.
Signs You Should Not Wait on Window Trim Rot
Some trim damage can be scheduled as part of regular exterior maintenance. Other conditions deserve prompt attention because moisture may already be moving beyond the visible surface. Contact a qualified contractor when you notice:
- Soft, spongy, cracked, or crumbling wood around the window
- Paint that bubbles or peels repeatedly in the same location
- Open caulk joints or visible gaps between trim and siding
- Dark stains, mold growth, or persistent dampness below a window
- Drafts, interior staining, or drywall damage near the window opening
These signs do not always mean the window itself has failed. They do mean the area should be inspected before another coat of paint covers the evidence.
Repair and Repaint Work Best Together
Window trim is one of the most exposed details on an exterior. A repair that is left unprimed or mismatched with the surrounding paint system can stand out and remain vulnerable. Combining repair with thoughtful exterior painting gives the window area consistent protection from the trim edge to the nearby siding.
This is especially useful when several windows show similar wear. Instead of dealing with one peeling board at a time, a property owner can address failing trim, wash away surface grime, prepare the exterior correctly, and apply a coating system designed for the conditions. The result is a cleaner appearance, but more importantly, a better barrier against moisture and sun exposure.
For commercial properties, well-maintained window trim also affects how customers and tenants see the building. Peeling or rotted exterior wood can make an otherwise well-kept property look neglected. Repairing it before repainting keeps the building professional and reduces the chance of water damage becoming a disruption later.
Can You Handle It Yourself?
A homeowner may be able to recaulk a small, dry joint or touch up minor paint wear. Once trim is soft, separated, or visibly decayed, the project becomes more involved. Proper wood window trim repair requires identifying hidden damage, safely removing failed material, matching the trim profile when needed, and rebuilding the surface so water does not return to the opening.
There are also practical risks. Aggressive scraping can damage nearby glass or siding. Filling a deep rotten area without removing unstable wood can trap moisture. And painting over damp trim often creates a temporary finish that fails soon after the next stretch of wet weather.
K&D Quality Painting brings more than 30 years of hands-on painting and repair experience to projects where surface preparation matters as much as the final coat. A clear inspection helps determine whether a focused trim repair, broader exterior wood repair, or repainting plan makes the most sense for your property.
If you see peeling paint, open seams, or soft wood around your windows, request a free estimate before the next rain finds its way behind the trim. A timely repair can preserve the details that make your home look cared for while helping the exterior do its job.