
Fence Staining Before and After: What Changes
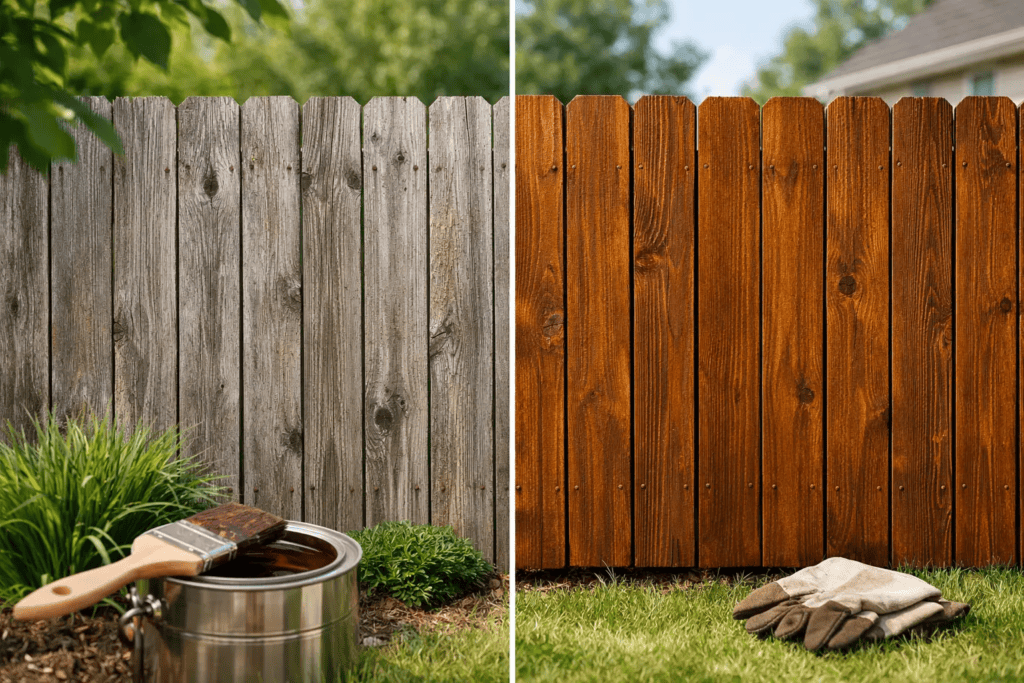
A fence can look worn out long before it is ready to be replaced. Grayed boards, dark water marks, mildew, and a faded finish often make homeowners think the wood has reached the end of its life. In many cases, fence staining before and after work shows a different story: sound wood can look cleaner, richer, and far better protected once it is properly prepared and finished.
For property owners in Pierce County and throughout the South Puget Sound area, staining is more than a color upgrade. It is a practical way to help exposed wood stand up to long wet seasons, changing temperatures, and summer UV exposure. The best results come from treating the fence as a surface that needs repair and preparation first, not simply as something that needs a fresh coat.
What Changes With Fence Staining Before and After
The visible difference is usually immediate. A weathered cedar fence may go from dull silver-gray to a warm natural wood tone. A faded brown fence can regain depth and even color. Stain can also reduce the patchy appearance caused by sprinkler water, soil splashback, algae, and uneven sun exposure.
But the more valuable change is not always visible from the street. Quality exterior stain helps limit moisture absorption while allowing wood to breathe. That matters in western Washington, where repeated rain and damp conditions can contribute to swelling, checking, mildew growth, and premature finish failure.
Stain does not make a fence maintenance-free, and it cannot reverse serious rot or straighten boards that have badly warped. It can, however, protect healthy wood and extend the useful life of a fence that still has good structural condition. The difference between a quick stain job and a lasting one usually comes down to what happens before the stain is applied.
Start With the Fence Condition, Not the Stain Color
Before selecting a transparent, semi-transparent, or solid-color stain, inspect the fence closely. Look at the lower sections near the soil line, the tops of posts, gate connections, and boards exposed to constant shade. These areas often show moisture damage first.
Loose pickets, protruding nails, cracked rails, and soft or punky wood should be addressed before finishing. Stain will not hold failing wood together. If a section has wood rot, replacing or repairing that section first gives the new finish a sound surface to protect.
Previous coatings also affect the right approach. A fence with old transparent stain may be a good candidate for cleaning and restaining. A fence covered in peeling solid stain may need more extensive prep to remove loose material and create a stable surface. Using the wrong product over an incompatible old coating can lead to blotchy color or early peeling.
A professional assessment helps avoid spending money on stain when repairs or more thorough surface preparation are the real need.
Cleaning Makes the Color Look Even
A clean fence absorbs stain more consistently. Dirt, pollen, mildew, algae, and oxidized old finish can all interfere with adhesion and leave dark or light patches after staining.
Pressure washing is often part of the preparation process, but it needs to be done carefully. Too much pressure, a nozzle held too close, or poor technique can scar softwood and raise the grain. The goal is to remove surface contamination without damaging the boards. In some cases, a cleaner and controlled wash are more effective than aggressive pressure alone.
After washing, the wood needs enough dry time before staining. This is especially important in the Puyallup, Tacoma, Graham, and Gig Harbor areas, where a fence may feel dry on the surface while retaining moisture deeper in the wood. Applying stain to damp boards can prevent proper penetration and shorten the life of the finish.
The weather forecast matters as well. Stain needs a suitable temperature range and a dry window for application and curing. Rushing a project because a sunny afternoon appears after several rainy days can create problems that do not show up until the following season.
Choosing the Right Type of Fence Stain
The right stain depends on the wood, its current condition, the desired appearance, and how much maintenance the owner is comfortable with over time.
Transparent stains provide the most natural appearance and allow the grain to remain highly visible. They work well on newer or well-maintained wood but generally offer less UV protection than more pigmented options. Semi-transparent stain adds color while still showing the grain, making it a popular choice for cedar fences with a weathered but attractive character.
Semi-solid and solid stains offer greater coverage and stronger color consistency. They can be a practical choice when boards have uneven tones, old discoloration, or cosmetic imperfections. The trade-off is that they hide more of the natural wood grain. Solid-color stain can give a fence a painted appearance, but it is formulated to perform differently from standard exterior paint.
No single option is best for every fence. A clear or lightly pigmented stain may look excellent on a newer cedar fence, while an older fence with varied board colors may benefit from a more opaque finish. The best choice is the one that delivers the appearance you want while providing realistic protection for the fence’s condition.
Why Preparation Shows in the Finished Result
When homeowners compare fence staining before-and-after photos, they often notice the color first. Experienced painters notice the details: clean edges around posts, even coverage along board ends, no missed areas behind gates, and a consistent finish without lap marks or heavy drips.
Those details reflect careful preparation and application. The wood may need light sanding in rough areas, scraping where an old coating is loose, and protection for nearby landscaping, concrete, siding, and windows. Gates should be opened and finished properly so the color does not stop at the most visible face of the fence.
Board ends deserve special attention because they can absorb water quickly. So do the horizontal tops of rails and pickets, which receive direct rain. Proper application methods and adequate coverage in these vulnerable areas help the entire fence perform more evenly.
At K&D Quality Painting, the work starts with the surface itself. If the fence needs cleaning, wood repair, or a closer look at failing material before staining, addressing those issues first is part of delivering a finish that looks right and holds up.
How Long Will a Stained Fence Last?
The honest answer is that it depends. Exposure makes a major difference. A fence facing strong afternoon sun may fade sooner than one in partial shade, while a shaded fence that stays damp may need more frequent cleaning to control mildew. Sprinklers, overgrown shrubs, soil contact, and poor drainage can all shorten the life of a stain finish.
Many fences benefit from periodic inspection rather than waiting until the wood is gray and dry again. Watch for fading on the sunniest side, water soaking in instead of beading on the surface, mildew buildup, or finish wear near the bottom of boards. Catching those signs early can make maintenance simpler and less expensive.
Keeping vegetation trimmed back also helps. Airflow allows the fence to dry after rain, while branches and wet leaves pressed against the boards can hold moisture in place. Avoid piling mulch or soil against fence boards, especially at the base, where hidden rot can develop.
When It Is Time to Stain Instead of Replace
A fence is often a good staining candidate when its posts and rails are stable, most boards remain firm, and the damage is mostly cosmetic or limited to small repairable areas. Staining can restore curb appeal while protecting the investment already in the yard.
Replacement may be the better value when posts are loose, rails are extensively rotted, many boards are splitting or failing, or the fence has widespread structural movement. Staining a fence with major deterioration can improve its appearance briefly, but it will not solve the underlying problem.
If you are unsure which side of that line your fence falls on, a free estimate can provide a clear starting point. A careful look at the wood, preparation needs, and desired finish will show whether staining is the practical next step. A well-prepared stain job gives your fence more than a better before-and-after photo – it gives the wood a stronger chance to handle the seasons ahead.