How to Match Drywall Texture After a Repair
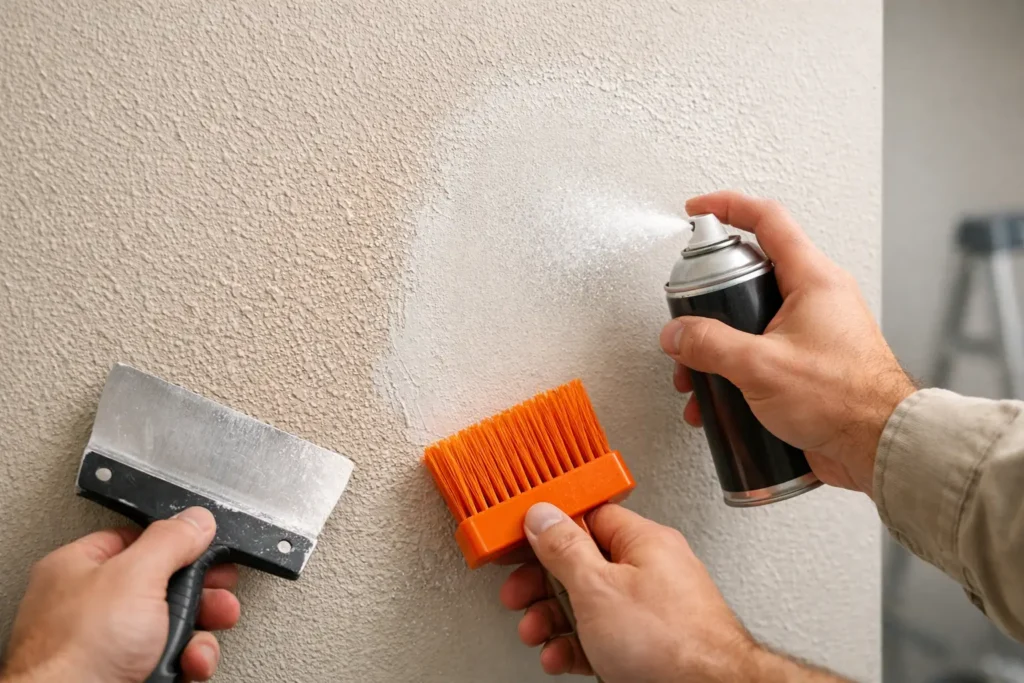
A drywall patch can be solid, smooth, and professionally taped, yet still stand out the moment light hits the wall. That is because the surrounding texture has its own pattern, depth, and direction. Learning how to match drywall texture means looking beyond the repaired area and rebuilding the finish so the wall reads as one continuous surface.
Texture matching is one of those jobs where preparation makes the difference. A shortcut may hide a repair temporarily, but side lighting from a window, lamp, or hallway fixture will often reveal every uneven edge. The best result comes from identifying the existing texture, repairing the drywall correctly, practicing the application method, and finishing with the right primer and paint.
Start by Identifying the Existing Wall Texture
Before mixing mud or picking up a spray can, inspect the entire wall, not just the damaged spot. Texture can look different across one room because of lighting, previous paint work, or repairs made over the years. Look at the wall from several angles and at different times of day if possible.
Common residential textures include orange peel, knockdown, skip trowel, stomp brush, sand texture, and smooth wall finishes. Orange peel has small, rounded bumps similar to the surface of citrus skin. Knockdown begins as sprayed or hand-applied texture, then is lightly flattened with a broad drywall knife. Skip trowel has wider, irregular marks left by a trowel. A smooth wall may seem simpler, but it can be the least forgiving because every seam, ridge, and sanding mark is visible.
Also check whether the texture is on top of several layers of paint. Thick paint can soften a texture’s appearance, while a freshly repaired and textured patch can look too sharp or raised if it is not blended carefully.
Repair the Surface Before Matching Texture
A texture coat cannot hide a weak patch, loose drywall paper, cracked tape, or an uneven repair. The damaged area needs to be stable and flat before the texture work begins. If the damage came from a leak, plumbing issue, roof problem, or repeated moisture exposure, correct that cause first. In South Puget Sound homes, moisture problems can continue behind the wall long after the visible stain has dried.
For a typical small repair, the process starts with removing loose material, securing the patch, and applying joint compound over tape and fasteners. Build thin coats rather than one heavy coat. Let each coat dry fully, then sand it smooth and feather it farther beyond the repair with each pass.
The goal is not to create a raised square of fresh compound. Run a broad knife over the area and feel the surface with your hand. If you can feel a hard edge, it may show after painting. A work light held close to the wall is especially useful for finding ridges, dips, and sanding scratches before texture is applied.
How to Match Drywall Texture With the Right Method
The application method should match both the texture type and the size of the repair. A small patch often calls for more control than a full wall or ceiling. It is wise to test the technique on cardboard, scrap drywall, or an inconspicuous area first. The test gives you a chance to adjust the thickness of the compound, spray distance, or tool pressure before working on the finished wall.
Matching Orange Peel
Orange peel is usually created with a texture spray or hopper. For a small repair, aerosol texture can work well when used carefully. Shake the can thoroughly, choose the closest available spray setting, and hold it at a consistent distance from the wall. Start spraying slightly outside the patch and move across it in light passes.
Do not try to create full coverage in one pass. Let the first coat develop, compare it with the original texture, and add light coats if needed. Spraying too heavily creates large droplets that do not match the finer texture on most interior walls.
Matching Knockdown Texture
Knockdown requires timing. First, apply a splatter texture using a hopper, texture brush, or thinned joint compound. Allow the peaks to set slightly, then lightly drag a wide drywall knife across them to flatten the high points.
If you knock it down too soon, the mud smears and loses definition. Wait too long, and the peaks may not flatten cleanly. The correct timing depends on room temperature, humidity, and the thickness of the compound. Practice is particularly helpful here because a knockdown pattern can vary substantially from one home to another.
Matching Hand-Applied Textures
Skip trowel and stomp textures need the same tool marks and rhythm as the existing finish. A skip trowel texture is generally made with a curved trowel or broad knife and a thin layer of joint compound. The tool skips across the surface, leaving irregular raised patterns. Avoid making the marks too uniform. Natural variation is part of what makes this texture blend in.
For stomp brush texture, apply the compound evenly, press the brush into the wet material, and pull away without twisting too much. Compare the size and spacing of the marks to the surrounding surface. On ceilings, work in manageable sections and protect floors, furniture, and walls from falling compound.
Matching a Smooth Wall
A smooth finish is less about adding texture and more about controlling the surface. Apply thin coats of compound, feather them wide, sand between coats, and inspect under angled light. Prime the repair before painting because primer reveals imperfections that bare compound can hide.
A smooth wall repair may need another skim coat after priming. That extra step takes time, but it is often what separates an acceptable patch from a finish that disappears into the wall.
Blend the Edges Instead of Texturing Only the Patch
One of the most common texture-matching mistakes is stopping at the edge of the repair. The patch may have the correct texture, but its outline remains visible because the transition is too abrupt. Extend the texture beyond the repaired area and gradually reduce the amount as you reach the existing wall finish.
This matters most on larger patches and in areas with direct light. A broad, soft blend is harder for the eye to detect than a neat but sharply defined textured square. It may feel counterintuitive to texture outside the repair, but that transition zone is where the match is won or lost.
Be cautious around corners, trim, outlet covers, and cabinets. Masking can protect nearby surfaces, though tape lines can also create an unnatural stop in the texture. Remove tape while the material is still workable when the application method allows it.
Prime Before You Paint
Fresh joint compound absorbs paint differently than painted drywall. If you paint directly over the repair, the patch may flash – meaning it appears duller, glossier, or a different shade depending on the viewing angle. A quality drywall primer or primer-sealer evens out absorption and gives the finish paint a consistent surface to bond to.
After the primer dries, inspect the wall again. This is the best time to catch a texture mismatch, a visible edge, or a shallow depression. Small corrections are far easier before the final paint coat goes on.
For the cleanest result, paint from a natural break to a natural break whenever practical. On a wall, that often means painting corner to corner rather than touching up only the patch. Even if the paint color is correct, old paint can fade, collect household grime, or develop a different sheen over time. Painting the full wall gives the repair the best chance of disappearing.
When a Professional Texture Match Makes Sense
Small orange peel repairs can be manageable for a careful homeowner. Larger patches, ceiling repairs, water damage, hand-applied textures, and smooth-wall finishes are more demanding. The work can also become more complicated when a repair involves damaged insulation, mold concerns, repeated leaks, or drywall that has softened from moisture.
A professional can assess the underlying damage, repair or replace affected drywall, match the texture, prime the surface, and repaint for a consistent finish. That full process matters because texture matching is not separate from drywall repair and painting. Each stage affects the final appearance.
For homeowners and property managers in Pierce County, K&D Quality Painting provides drywall repair, texture matching, and interior painting with the preparation needed for a durable, finished look. Request a free estimate when the repair is larger than a simple patch or when you want the wall to look right the first time.
A well-matched texture should not draw attention to itself. When the repair is properly feathered, textured, primed, and painted, the room looks maintained rather than repaired – exactly the result a finished wall should deliver.